"Lord willing" has lately become the amen of any plan I make. My lumber remains uncut in the wood shop, which is just as well when the temperatures are below freezing and there isn't a heat source.
At the end of October 2016, my husband and I delivered our second child, a sweet baby boy. Complications changed all the plans and hopes we had for his birth, and we ended the event by air-lifting to Seattle Children's Hospital. We have been living in Seattle for several months now. The short story is that our son also has cystic fibrosis which caused some issues requiring four surgeries (three in his first week of life, and the fourth taking eight hours!). God is so good! Our little boy is doing well now, though his progress in recovery is slow, we are working toward a possible transfer back to Montana . . . in a few months.
In the meantime, with the hours spent at the hospital I thought I might study the Swedish language. I've acquired a "teach yourself" book with CD's and a basic grammar workbook. Also, I anxiously await the arrival of "Bygg en Nyckelharpa" on dvd purchased through Amazon.com (produced by Rita Leydon and available on her website and Amazon; following the builder, Soren Ahker).
I'll fine-tune my drawings and cut list for my new nyckelharpa so that I can can get right to work when we finally come home.
Other woodworking projects and plans put on hold: The Dutch toolbox is nearly finished! I made a dealgan (Scottish drop spindle. I got tired of breaking my delicate top-whorl spindle) using my power drill as a lathe. I'd like to make flower boxes for the deck railing. My hubby wants a bench by the back door for putting on and taking off/ storing shoes. A toy box for our kids. Etc, etc.
We'll see how far I get . . . Lord willing!
Tuesday, February 7, 2017

Tuesday, May 3, 2016
Nyckelharpa #2 - Planning
Just so you know . . . I made a new blog and moved all of my posts from LemonFloss to StillwaterStrings.blogspot.com Updates on this project (and new projects) may be found there!
I recently had a fantastic opportunity to have a nyckelharpa lesson with Aryeh Frankfurter when he and his wife came through Montana on part of their performance tour. The amount of information he gave me was enormous for a beginner. The main thing, I believe, is to play the instrument. I have a long road to travel as a nyckelharpa player, but I'm now pointed in the right direction.
I am also excited to build a second harpa. I was allowed to take a side-by-side picture of Aryeh's nyckelharpa and mine. He insisted I try playing his instrument. It was much lighter and although the same overall length, it was slightly narrower and seemed easier to hold for my small size.
My goal on this harpa isn't to recreate the other craftsman's design, but rather to incorporate those differences I liked and felt would improve my first instrument. Lighter and "smaller".
My sweet husband took me shopping for wood at Winsor Plywood, where I picked up some more alder, but also purchased some vertical grain fir to use on the top and bottom. The grain on the VG fir is very close and very straight, looking similar to spruce. It is also a slightly harder wood than spruce according to the Janka hardness scale.
 The shade of the wood is closer between the two.

And the grain of the fir can be seen here.
Design main changes I hope to incorporate:
I recently had a fantastic opportunity to have a nyckelharpa lesson with Aryeh Frankfurter when he and his wife came through Montana on part of their performance tour. The amount of information he gave me was enormous for a beginner. The main thing, I believe, is to play the instrument. I have a long road to travel as a nyckelharpa player, but I'm now pointed in the right direction.
I am also excited to build a second harpa. I was allowed to take a side-by-side picture of Aryeh's nyckelharpa and mine. He insisted I try playing his instrument. It was much lighter and although the same overall length, it was slightly narrower and seemed easier to hold for my small size.
My goal on this harpa isn't to recreate the other craftsman's design, but rather to incorporate those differences I liked and felt would improve my first instrument. Lighter and "smaller".
My sweet husband took me shopping for wood at Winsor Plywood, where I picked up some more alder, but also purchased some vertical grain fir to use on the top and bottom. The grain on the VG fir is very close and very straight, looking similar to spruce. It is also a slightly harder wood than spruce according to the Janka hardness scale.


And the grain of the fir can be seen here.
Design main changes I hope to incorporate:
- longer and narrower neck/ keybox
- shorter and narrower body with a thinner top and bottom
- bent-wood top instead of planed/carved
- minor adjustments to bridge, string nut and keys
This time around, I'd like to try steaming/bending the top instead of planing it to shape, so I'll be needing to build a steam box and a jig for shaping.
Sunday, May 1, 2016
The Bray Harp
Just so you know . . . I made a new blog and moved all of my posts from LemonFloss to StillwaterStrings.blogspot.com Updates on this project (and new projects) may be found there!
The bray harp is mostly finished. All it lacks at this point are actual "brays". I was eager to string it and hear its voice, so I opted for pins without the bray portion (which I can fabricate and glue on later). This will be a brief run-down of its construction, as I'm moving and beginning a new project . . . another nyckelharpa!
 Here are the back and front of the soundbox, and the string rib which is glued to the inside of the front or "soundboard" of the box. The entire harp is made out of bird's eye maple (Winsor Plywood was having a 1/2 price sale). This hard wood was difficult to work at first. A woodworker at the local school helped me rip the boards closer to the thickness I desired.
My husband bought me a saber saw and new ROS for our first anniversary--nothing says "I love you" like more tools!

However, the tool I had the most success with on this tricky grain was my little cabinet scraper. I learned how to turn a good burl on this simple piece of steel, and finishing (though still a lot of work) was much easier and even faster than using a sander.

Because this is a medieval harp, the tension of the strings is much less than that of a modern harp. That being so, the grain on the soundboard could be vertical. The sides and end caps of the soundbox are shown here. The bottom is slightly deeper than the top, and slightly wider, too.
 I used regular Titebond glue to laminate two pieces together for the pillar. On the rest of the joints, though, I learned how to use a two-part epoxy with a filler (wood flour I saved and sieved for the very finest dust), since the epoxy is more forgiving if my surfaces aren't perfectly flush.

Once again, I borrowed some time on the drill press at the school shop building, so that my peg holes would be straight. This harp doesn't use fret pins. I learned how to use a taper-bit, and I think I got the hang of it by the 16th hole. Even if your taper drilling is great, there will still be some variation between individual pins, so you insert the pins and then swap out the ones that stand proud with those that sink a little too far.

The carving along the neck is actually functional for the harp. It creates a ridge on which you can fret and get sharp notes. I had to carve away quite a bit at the knee block so the top strings could vibrate freely.

The completed harp with the first strings attached. You can see there is a very slight curve to the pillar. I'm not sure why it was designed that way.

The other side of the neck with a great view of the grain on the back of the soundbox. I just love the grain of this wood!

Decorative sound holes and the front of the pillar. The pillar is the only thing I'm not happy with. I had planned to us three pieces so they would be even, instead I used a thick and a thin piece, which works but doesn't appeal to my eye. The reason I did it that way is that I didn't want to have to cut and thickness another two pieces (aka I got lazy).

A first test drive!
I do hope to make the brays, having planned ahead and making my pins so that I could "simply" take the pins out and glue on the brays. The brays can be "turned off" by twisting them to the side if I don't want the bray sound.
Rick Kemper of Sligo harps has a building guide for this harp for sale on his website, as well as blueprints for his own line of celtic harps (As well as finished harps for sale)!
The bray harp is mostly finished. All it lacks at this point are actual "brays". I was eager to string it and hear its voice, so I opted for pins without the bray portion (which I can fabricate and glue on later). This will be a brief run-down of its construction, as I'm moving and beginning a new project . . . another nyckelharpa!
 Here are the back and front of the soundbox, and the string rib which is glued to the inside of the front or "soundboard" of the box. The entire harp is made out of bird's eye maple (Winsor Plywood was having a 1/2 price sale). This hard wood was difficult to work at first. A woodworker at the local school helped me rip the boards closer to the thickness I desired.
My husband bought me a saber saw and new ROS for our first anniversary--nothing says "I love you" like more tools!

However, the tool I had the most success with on this tricky grain was my little cabinet scraper. I learned how to turn a good burl on this simple piece of steel, and finishing (though still a lot of work) was much easier and even faster than using a sander.

Because this is a medieval harp, the tension of the strings is much less than that of a modern harp. That being so, the grain on the soundboard could be vertical. The sides and end caps of the soundbox are shown here. The bottom is slightly deeper than the top, and slightly wider, too.
 I used regular Titebond glue to laminate two pieces together for the pillar. On the rest of the joints, though, I learned how to use a two-part epoxy with a filler (wood flour I saved and sieved for the very finest dust), since the epoxy is more forgiving if my surfaces aren't perfectly flush.
Once again, I borrowed some time on the drill press at the school shop building, so that my peg holes would be straight. This harp doesn't use fret pins. I learned how to use a taper-bit, and I think I got the hang of it by the 16th hole. Even if your taper drilling is great, there will still be some variation between individual pins, so you insert the pins and then swap out the ones that stand proud with those that sink a little too far.

The carving along the neck is actually functional for the harp. It creates a ridge on which you can fret and get sharp notes. I had to carve away quite a bit at the knee block so the top strings could vibrate freely.

The completed harp with the first strings attached. You can see there is a very slight curve to the pillar. I'm not sure why it was designed that way.

The other side of the neck with a great view of the grain on the back of the soundbox. I just love the grain of this wood!

Decorative sound holes and the front of the pillar. The pillar is the only thing I'm not happy with. I had planned to us three pieces so they would be even, instead I used a thick and a thin piece, which works but doesn't appeal to my eye. The reason I did it that way is that I didn't want to have to cut and thickness another two pieces (aka I got lazy).
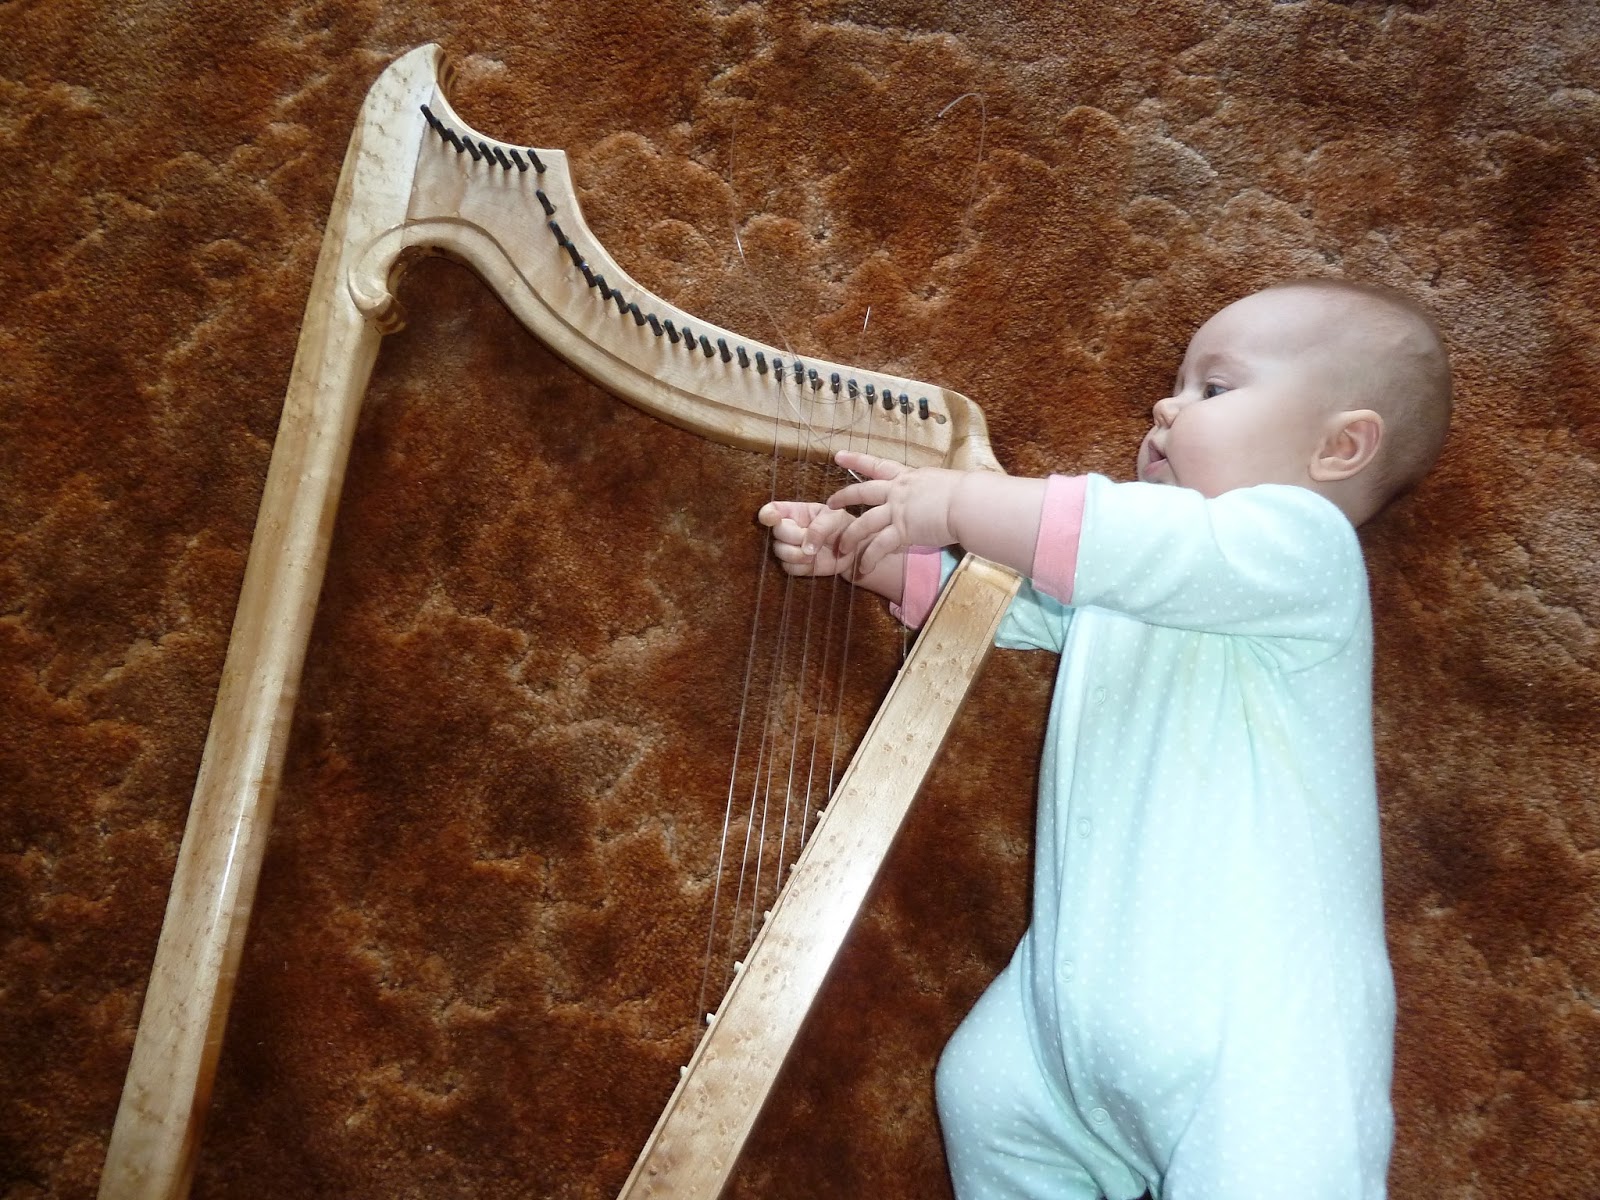
A first test drive!
I do hope to make the brays, having planned ahead and making my pins so that I could "simply" take the pins out and glue on the brays. The brays can be "turned off" by twisting them to the side if I don't want the bray sound.
Rick Kemper of Sligo harps has a building guide for this harp for sale on his website, as well as blueprints for his own line of celtic harps (As well as finished harps for sale)!
Tuesday, December 8, 2015
New project: Bray Harp
I encountered a medieval bray harp at a harp retreat in 2007. I don't know what the draw was then, but now it seems an interesting project to add to my woodworking skills.
A bray harp is a harp with special pins which cause the harp strings to buzz when plucked--sort of like a medieval synthesizer. It's a very harsh sound, but I believe the idea behind it was to make the harp loud enough to be heard when playing with other instruments. The harp is also very narrow and tall, with a fairly large range and close string spacing. Instead of stringing the harp through access holes on the back, the sound box is solid and the strings are held by pins through the sound board.
Windsor Ply had a great sale on birdseye maple. I purchased a tech drawing from the Boston Museum of Fine Arts, and contacted Rick Kemper of Sligo Harps for guidance in the construction process.

Apparently, it's possible to purchase tech drawings from many museums.
I began by attempting to rip my boards down, closer to the thicknesses I wanted to work with, using my hand saw. I then took a break for a special event . . .

. . . very special!
A bray harp is a harp with special pins which cause the harp strings to buzz when plucked--sort of like a medieval synthesizer. It's a very harsh sound, but I believe the idea behind it was to make the harp loud enough to be heard when playing with other instruments. The harp is also very narrow and tall, with a fairly large range and close string spacing. Instead of stringing the harp through access holes on the back, the sound box is solid and the strings are held by pins through the sound board.
Windsor Ply had a great sale on birdseye maple. I purchased a tech drawing from the Boston Museum of Fine Arts, and contacted Rick Kemper of Sligo Harps for guidance in the construction process.

Apparently, it's possible to purchase tech drawings from many museums.
I began by attempting to rip my boards down, closer to the thicknesses I wanted to work with, using my hand saw. I then took a break for a special event . . .

. . . very special!
Friday, December 5, 2014
The Finished Harpa
The nyckelharpa has been finished for a few months now, and my posting on the project went by the wayside in lieu of my wedding and everything that entails.
Here is the finished instrument and I must say I'm pretty proud of it!

The finish looks wonderful--thank you to my friends, the Welkers, who allowed me to fumigate their garage last winter to apply the varnish! Thanks to Lon B. for the piece of leather from his leather working business!
Thanks to Earl Holzman for the wonderful bow he made for me--check out his website for ordering!
I'll post more pictures tomorrow.
I had to rework the key box due to a miscalculation of the spacing of the keys. They are truly spaced much closer than you might expect--the last few keys being very thin or delicate, which meant that the "spacers" on the key box components (the "key holders") had to be very thin. It was pretty frustrating trying to carve the fine pieces and eventually I just popped them out and glued them back in on purpose.
All the keys slide well. I do have plans to rework my tangents with a different wood, heavier and harder than the cherry wood I used originally. The sound is great on the highest string, good on the middle string, and fairly good on the bottom string but not fantastic. I'm hoping I can get a better sound by replacing the tangents with the higher density wood.
I have also just purchased a copy of Peter Puma Hedlund's nyckelharpa school vol. #1, available through Rita Leydon's website (the producer of some fine films on Swedish music). I can't wait to truly get started learning how to properly hold and play this instrument, and perhaps one day I'll be able to take a few live lessons with a nyckelharpa professional!
Here is the finished instrument and I must say I'm pretty proud of it!
The finish looks wonderful--thank you to my friends, the Welkers, who allowed me to fumigate their garage last winter to apply the varnish! Thanks to Lon B. for the piece of leather from his leather working business!
Thanks to Earl Holzman for the wonderful bow he made for me--check out his website for ordering!
I'll post more pictures tomorrow.
I had to rework the key box due to a miscalculation of the spacing of the keys. They are truly spaced much closer than you might expect--the last few keys being very thin or delicate, which meant that the "spacers" on the key box components (the "key holders") had to be very thin. It was pretty frustrating trying to carve the fine pieces and eventually I just popped them out and glued them back in on purpose.
All the keys slide well. I do have plans to rework my tangents with a different wood, heavier and harder than the cherry wood I used originally. The sound is great on the highest string, good on the middle string, and fairly good on the bottom string but not fantastic. I'm hoping I can get a better sound by replacing the tangents with the higher density wood.
I have also just purchased a copy of Peter Puma Hedlund's nyckelharpa school vol. #1, available through Rita Leydon's website (the producer of some fine films on Swedish music). I can't wait to truly get started learning how to properly hold and play this instrument, and perhaps one day I'll be able to take a few live lessons with a nyckelharpa professional!
Monday, January 27, 2014
The Key Box
A year later, I'm picking up where I left off in my blog posts. The nyckelharpa is finished and I'm thoroughly enjoying playing it!
When I left off, I was beginning the keybox. A nyckelharpa is bowed like a violin. However, to get the variety of notes needed for a melody, it is fretted, but not in the usual way . . . You need a keybox!
A keybox holds --ready?-- the keys! The keys hang downward away from the strings and hold the tangents--pieces of wood sticking up at right angles to the keys (some of them passing through one or two layers of keys)--which, when a key is pushed "upward" or "in" (NOT like a piano! Think of a sliding motion rather than a pressing down motion), moves the tangent against the string and gives your variety of notes. (This is where I could start going into details about string length and diameter, and how these variables apply in a harmonic curve. If you're curious, that will be at the bottom).

The keybox is like a layer cake. I began with the bottom and worked to the top, because each layer must fit and work with the layer below. It was tedious. This is the bottom, which is screwed to the neck of the instrument. I used a small saw where I could, but mostly used a chisel to shape the odd angles.

My fingers are gripping the part which attaches to the neck, and the slight "rise" is where it begins to hover over the soundboard.

Simultaniously, I began ripping blanks for carving keys. Whew! I learned from the PBS long-running show, "The Woodwright's Shop", hosted by Roy Underhill, to cut around the corners in order to end up with an even thickness.

Hours, days, weeks later . . . I have some nice blank sheets to cut smaller pieces from. Then I switched to my pocket knife to "whittle" the keys to fit, each one individually. (the ultimate "custom job").

The keys need to rest in slots. Think of a turret on a castle. After carving the bottom "layer", I began on the next layer and discovered I could use my saw to cut the depth, and then use the point of my knife to score stopping point. I could then pop the waste out. Occasionally, I would also pop out the "tooth" which was meant to stay, but wasn't an issue and was easily glued back into place.

When I left off, I was beginning the keybox. A nyckelharpa is bowed like a violin. However, to get the variety of notes needed for a melody, it is fretted, but not in the usual way . . . You need a keybox!
A keybox holds --ready?-- the keys! The keys hang downward away from the strings and hold the tangents--pieces of wood sticking up at right angles to the keys (some of them passing through one or two layers of keys)--which, when a key is pushed "upward" or "in" (NOT like a piano! Think of a sliding motion rather than a pressing down motion), moves the tangent against the string and gives your variety of notes. (This is where I could start going into details about string length and diameter, and how these variables apply in a harmonic curve. If you're curious, that will be at the bottom).
The keybox is like a layer cake. I began with the bottom and worked to the top, because each layer must fit and work with the layer below. It was tedious. This is the bottom, which is screwed to the neck of the instrument. I used a small saw where I could, but mostly used a chisel to shape the odd angles.
My fingers are gripping the part which attaches to the neck, and the slight "rise" is where it begins to hover over the soundboard.
Simultaniously, I began ripping blanks for carving keys. Whew! I learned from the PBS long-running show, "The Woodwright's Shop", hosted by Roy Underhill, to cut around the corners in order to end up with an even thickness.
Hours, days, weeks later . . . I have some nice blank sheets to cut smaller pieces from. Then I switched to my pocket knife to "whittle" the keys to fit, each one individually. (the ultimate "custom job").
Lots of intricate cutting ahead. You can see the bottom pieces are just right! On to the next layer!
Harmonic Curve & etc:
Imagine a grand piano (or a harp). When you sit at the piano, the bass (low notes) side extends further away from you and the treble (high notes) side is pretty short. That's a harmonic curve. You can get fancy and scientific with the diameter (thickness) of the strings vs. the length of the string, but BASICALLY a long string will have a lower sound and a short string will have a higher sound.
A string has a "vibrating length"--the string starts at one point and stops at another point and what is in between those points can vibrate freely. When you fret the string (press it against a different point along that vibrating length) you essentially make it shorter, which makes the note sound higher.
In the case of my nyckelharpa, all the strings have the same vibrating length, so how do I get so much variety from very high and squeaky to low and rich? You change how thick the strings are! The lower notes come from thicker strings. Like a wind chime with pieces of metal rods: the really high tinkly sounds come from thin and short rods--the lower gong-like sounds come from longer thicker rods. If the rods weren't made thicker, they would have to be much longer to get the same low note (and you'd have to find yourself one heck of a tree to hang it on!).
That's my short and condensed version.
Sunday, July 7, 2013
Almost There!
The project is nearing completion!
I still need to do some shaping on the tailpiece. Then, the peg holes need to be drilled. After that, I can apply a finish to protect the wood--especially the soundboard and back which are made from the softer redwood.

I've whittled away quite a lot on the tailpiece . . . and my poor fingers. The short story is to always pay attention to what you're doing, and if you're fatigued it might be a good idea to call it a day. After using a chisel for the better part of the day, I took a half-inch slice to the thumb. It has healed better than the blistered spot just above the cut, and the various other nicks and bruises.

I dug around the internet to learn what I could about sound holes. I only followed two basic things: 1) the notches should line up with the feet of the bridge, and 2) the top holes should be just to the outside of the feet of the bridge. I decided to wing it on the rest. The masking tape helped to prevent tear-out. I cleaned the holes up with a little sand paper.
 Again, I really had no clue about the bass bar; so, there it is. The rule I found about bass bars said the bar should run underneath the [left] foot of the bridge. I assumed the highest point should be near the notches of the f-holes, then tapers on both ends. It's about 1/2 inch (or slightly more) thick. I used this piece because it sounded musical when I tapped all up and down it. Highly scientific.
 At this point I got carried away and forgot to add a label to the inside of the soundbox. Oh well. I think I'll remember it's mine. If I ever become a world-famous nyckelharpa builder, this one will be special without a label . . . like a piece of McCoy pottery.
These little clamps are working so well!

I still need to do some shaping on the tailpiece. Then, the peg holes need to be drilled. After that, I can apply a finish to protect the wood--especially the soundboard and back which are made from the softer redwood.

I've whittled away quite a lot on the tailpiece . . . and my poor fingers. The short story is to always pay attention to what you're doing, and if you're fatigued it might be a good idea to call it a day. After using a chisel for the better part of the day, I took a half-inch slice to the thumb. It has healed better than the blistered spot just above the cut, and the various other nicks and bruises.

I dug around the internet to learn what I could about sound holes. I only followed two basic things: 1) the notches should line up with the feet of the bridge, and 2) the top holes should be just to the outside of the feet of the bridge. I decided to wing it on the rest. The masking tape helped to prevent tear-out. I cleaned the holes up with a little sand paper.


These little clamps are working so well!

And here it is! A little more fitting to do on the tailpiece, peg holes to be drilled, and the keybox underway!
Subscribe to:
Posts (Atom)